How to Set Up Predictive Coding
by Everlaw

Predictive coding is an ambiguous term, because every vendor and firm seems to do it differently. So, we want to lift the veil. Below is how to set up predictive coding on the Everlaw platform.
1) Create a New Model
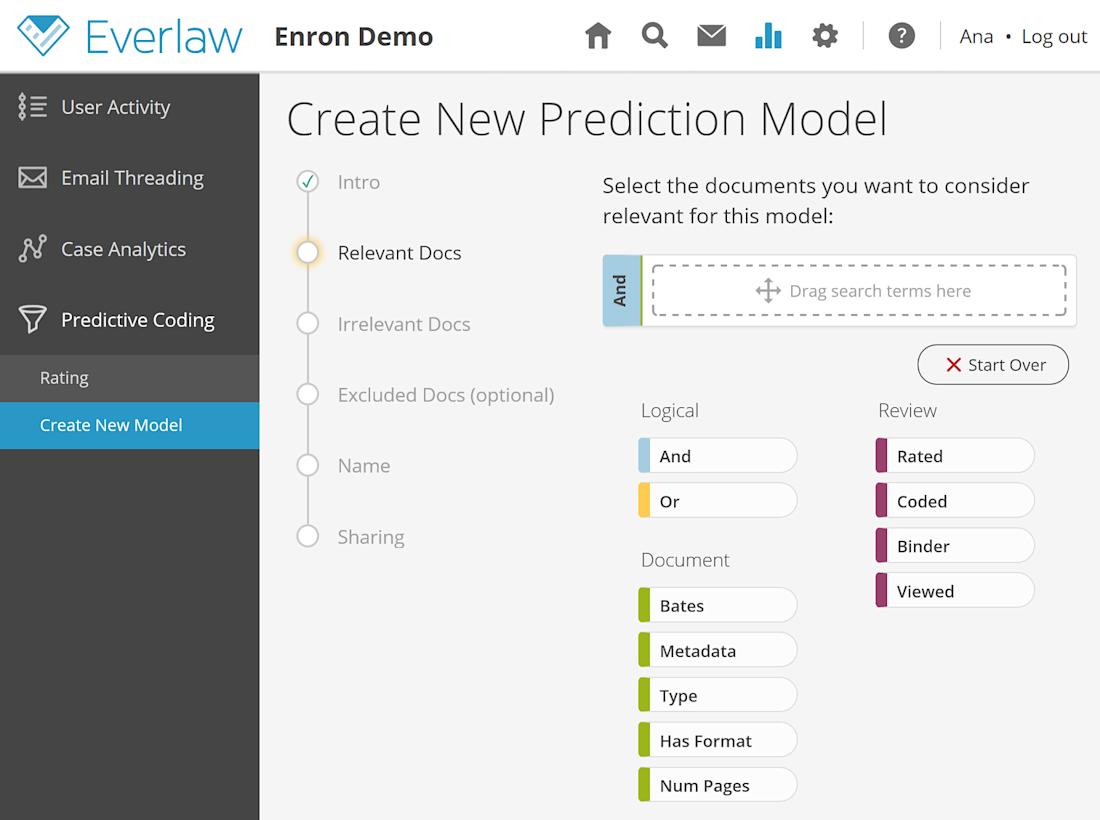
You can create a new model in your case by clicking on the green plus button in the upper right corner of the predictive coding page. The page will help you set up your model, by naming it, specifying the “relevant” and “irrelevant” criteria, and identifying optional exclusion criteria. You can use all of the advanced functionality offered by our search interface, like fuzzy or proximity searches.

When you define your relevant docs, keep in mind that relevance doesn’t have to be named “hot” and “cold.” You can choose the appropriate criteria for your needs and your step of the workflow. For example, you could code something as likely to be “Andrew Fastow” or unlikely to be “Andrew Fastow.”

2) Review the Appropriate Documents
Once your predictive coding model is set up, you will receive suggested next steps. These recommendations are geared to help improve the accuracy and performance of your model. Each suggestion is specific, indicating exactly how many more documents need to be reviewed for meaningful visualizations. For instance, in this example, the recommendation is to review 2,980 documents not yet covered well in the training set.

3) Review the Predicted Relevance Chart
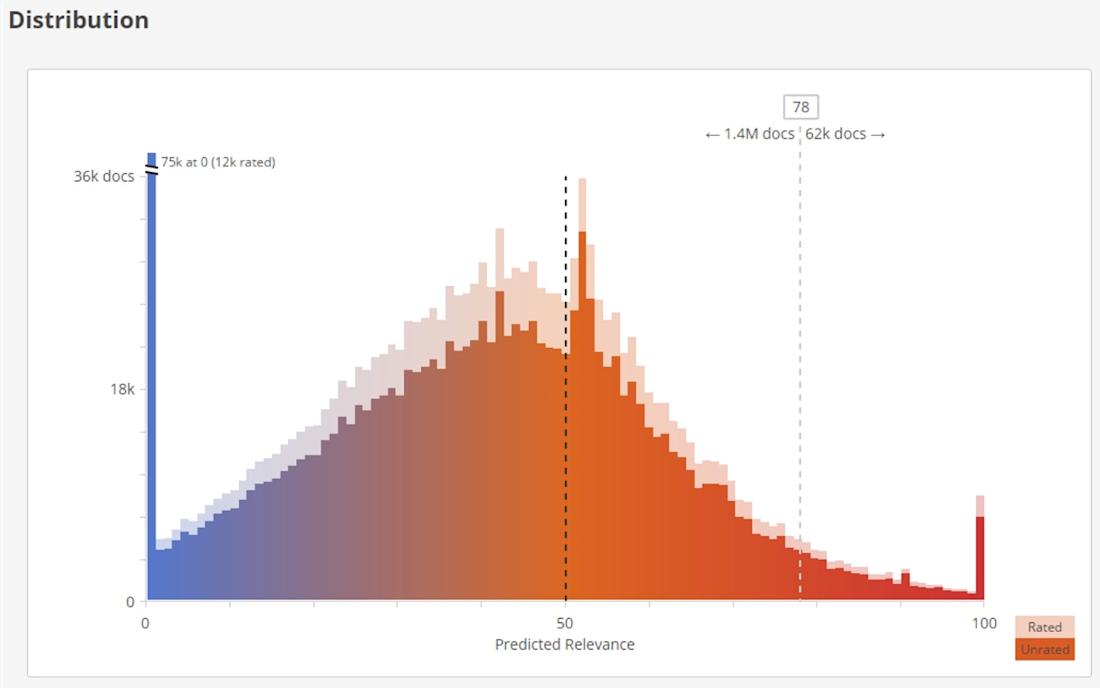
Once the appropriate number of documents have been reviewed, the “Next Steps” box will be replaced with a graph. This chart shows the distribution of predictions for both currently rated and unrated documents. Dragging and dropping the cutoff line will display the number of documents lying above and below the cutoff score. Clicking on one of the numbers will open a results table with the documents likely to be relevant based on your chosen prediction score.

This way, the graph accommodates your workflow. For example, you can isolate the documents most likely to be relevant by picking a high relevance threshold. Or, you can cast a broader net with a lower threshold when looking for documents that might have been missed.
4) Improve Predicted Relevance
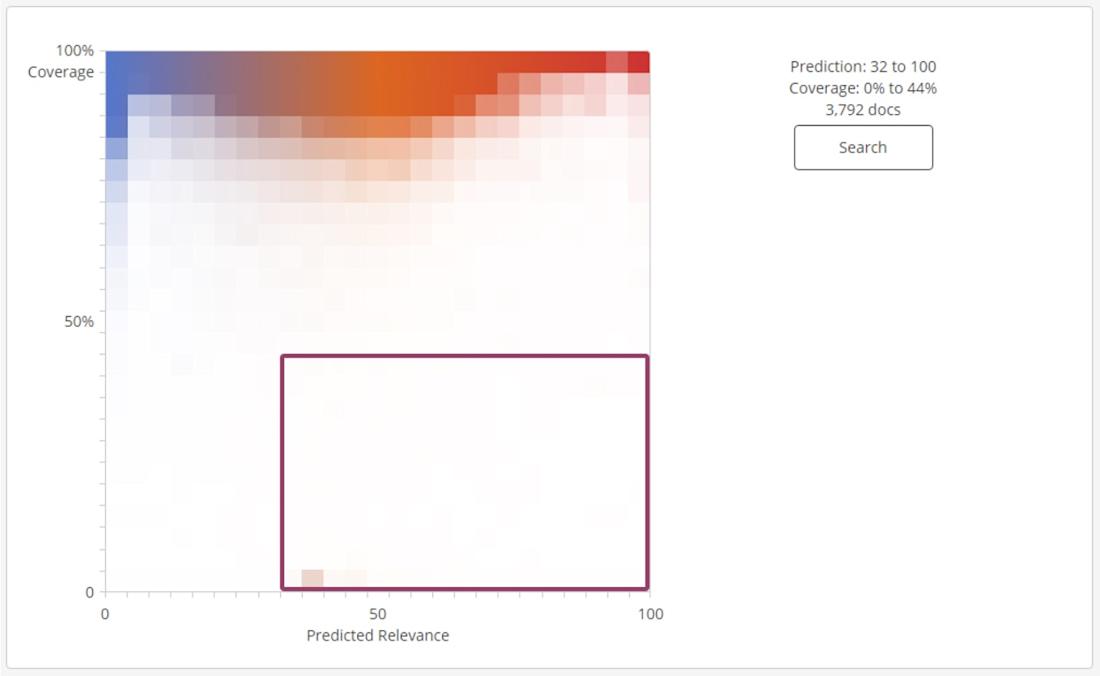
Right below the predicted relevance chart, you’ll find a training coverage chart. It can help you further refine your predicted relevance graph by selecting which documents to review next – after a model is established. It gauges how similar new documents are to the documents already reviewed. Documents that have many features already seen and included in the training corpus will have higher coverage scores, while documents with few features included in the training corpus will have low coverage scores.
On the chart, you can click and drag to highlight an area of the graph. After highlighting the area, click “search” to see documents whose coverage scores and predicted values are in the range you highlighted. This way, you can use this chart to identify the best documents to review to improve the strength of your predictive coding results. More on that next week!

5) See Model Status
Below the predicted relevance chart, you can see the status of your predictive model. It shows when the model was last updated, and how many documents have been manually reviewed since the last update was completed.

6) Create Training Sets
Right below the status bar is where you can create training sets for your predictive coding model. This is especially useful when the “Next Suggestions” indicate that you need to review more documents: just generate a new training set to inform your model. Training sets can be created from all the documents in your case, or from a specific search. You can even use specific criteria and permissions to create training sets for reviewers with domain-specific expertise.

Next week, look for details on how to interpret the metrics and terminology of predictive coding, along with best practices.

Everlaw’s advanced technology empowers organizations to navigate the increasingly complex ediscovery landscape, tackle the most pressing technological challenges, and chart a straighter path to the truth—transforming their approach to discovery, investigations, and litigation in the process.